This is part three of a five-part series of posts on compiling Amiga-specific C code on an (emulated) Amiga A1200. We’ll start with a machine with an empty hard drive, and over the series, build up to compiling an Amiga-specific program which use the graphics library.
Let’s go!
My first task here was to choose a C compiler to use. There are a few available. Back in the day, I used DICE, but I heard that it’s pretty tricky to get setup, and it seems that the only binary version available is one that someone compiled from source. I ruled it out because I wanted something that “Just Works”, and this didn’t feel like it.
Some of the contenders were SAS/C (formerly known as Lattice), GCC, and VBCC. From the unofficial SAS/C page, it looks like it’s reached end of life. While GCC offers a modern cross-platform toolchain, the latest version for Amiga is 2.7.2, which dates from 1998. VBCC seems to still be in active development, is cross-platform, and can cross-compile for other platforms. Its relatively simple setup was another factor that led me to choose VBCC for this series.
For VBCC, you download the compiler for the host platform you’re compiling on, and then download one or more target files for the platforms you want to compile for. In our case, we’ll get both of them for m68k (the Motorola 680x0 series or processors).
We’ll also need to pick up the latest version of the NDK (Native Development Kit) for AmigaOS 3.x, which includes libraries and headers that we’ll need to compile our programs.
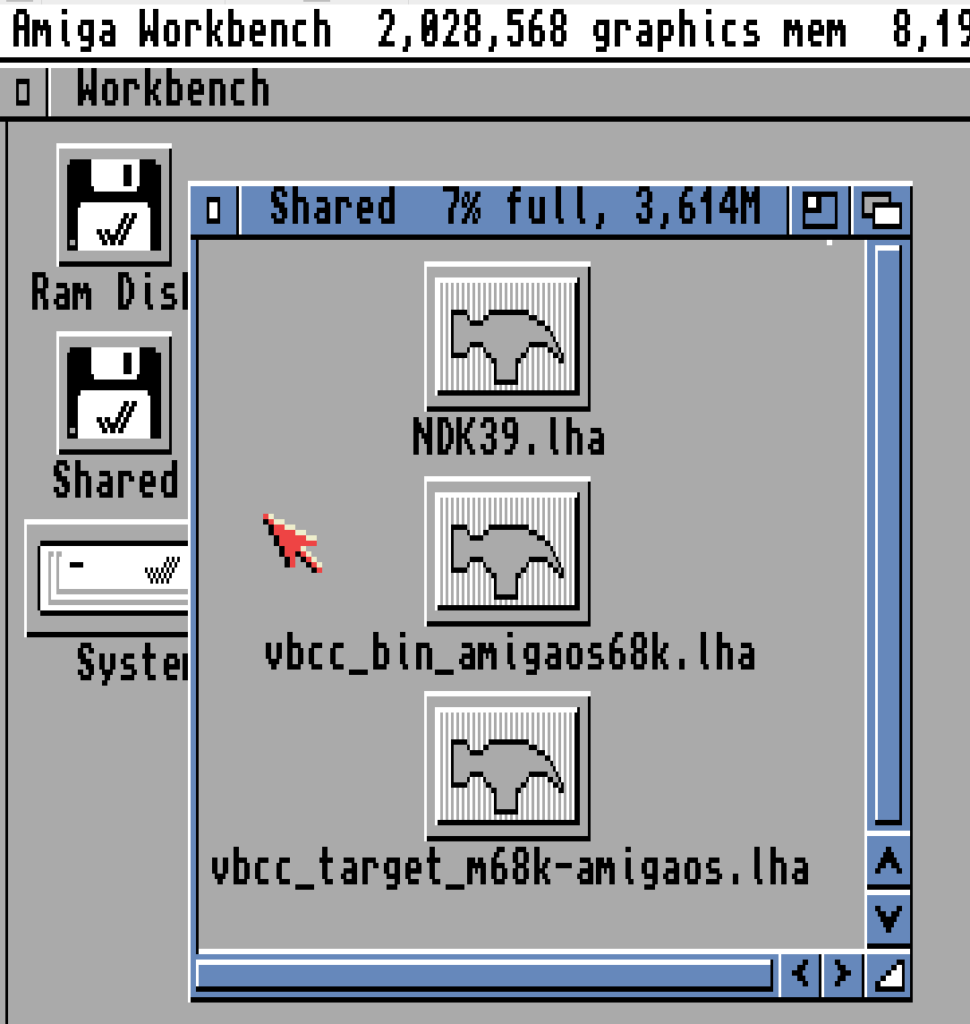
Here’s what we need to grab:
Note that the VBCC target is for AmigaOS 2 / 3, and if you want to compile for e.g. Workbench 1.3, there’s a different download for that.
Like we did last in the previous post, put the .lha files into the Amiga Forever Shared folder, and boot up the emulator.
This time, we’ll use the Shell do a lot of the work, rather than dragging and dropping in Workbench. Open a shell, and execute the following:
makedir c_dev
lha e Shared:NDK39.lha c_dev/
lha e Shared:vbcc_bin_amigaos68k.lha ram:
lha e Shared:vbcc_target_m68k-amigaos.lha ram:
Now, open the RAM disk with Workbench, and you’ll find two drawers in there. We’ll need to start with the binaries, so open up its drawer and double click the Install icon.
If you followed a long last week and installed the installer to C:, then this should begin the installation process automatically. Choose “Proceed With Install” then “Proceed”. When prompted for an install location, choose System:c_dev. That’s it, installation should have completed, and installed the VBCC binaries to System:c_dev/vbcc.
Now, we need to install the target files, so run the installer from in the other drawer in RAM. As we did with the binaries, kick off the installation. You’ll be prompted to locate the system headers directory. The default is include:, but we didn’t set up that assign to point to the includes we extracted from the NDK, so we’ll need to choose System:c_dev/NDK_3.9/Include/include_h here.
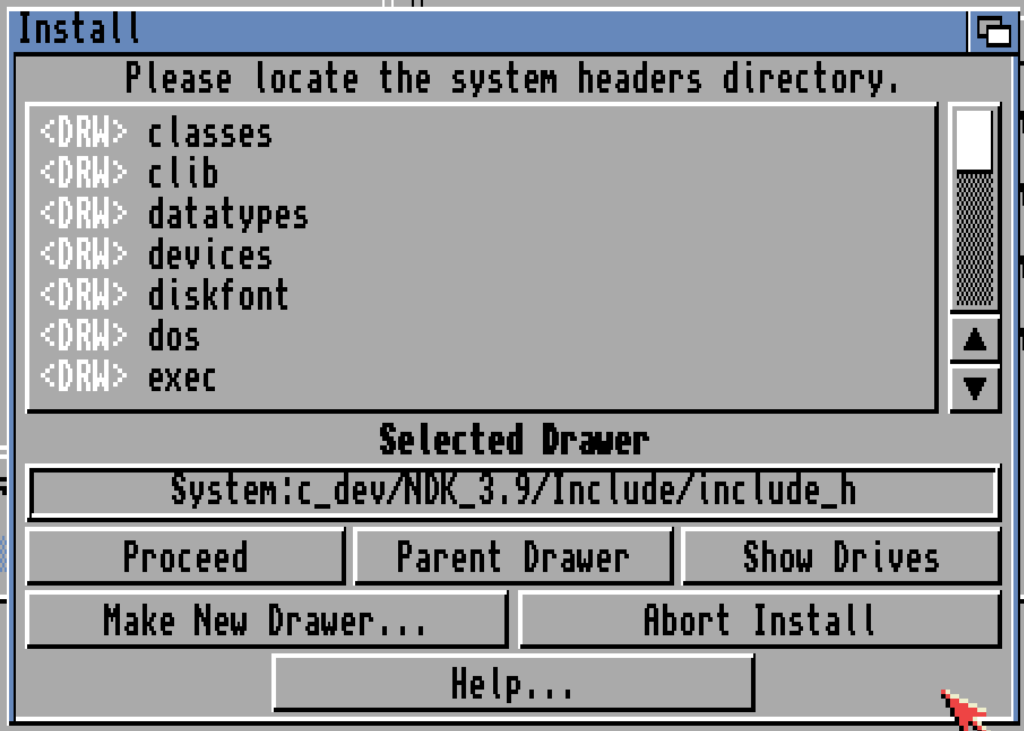
Once you’ve selected the right directory, hit “Proceed” again, and the installation finishes up pretty quickly. If you’re planning on shutting down your virtual machine now, you could delete the two drawers from the RAM disk to reclaim some memory.
We now have VBCC and the AmigaOS NDK installed on our machine! Next time, we’ll check everything’s working by compiling a simple “Hello world” program.