This is part two of a five-part series of posts on compiling Amiga-specific C code on an (emulated) Amiga A1200. We’ll start with a machine with an empty hard drive, and over the series, build up to compiling an Amiga-specific program which uses the graphics library.
Let’s go!
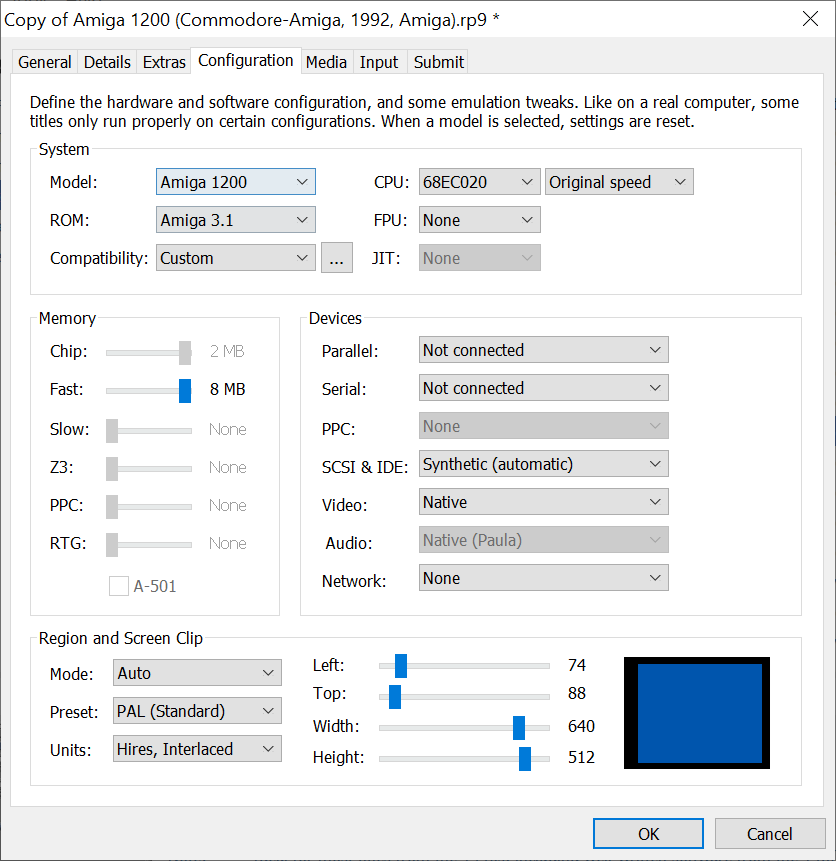
The first thing we’ll do is make fresh virtual machine, by copying the “Amiga 1200” machine provided as part of the Amiga Forever installation. In Amiga Forever, we can just right click on the Amiga 1200 machine and choose to “Create Copy”. Then, we click the edit button (the pencil on the toolbar) to bring up the settings for our VM.
The benefit of copying from the existing Amiga 1200 machine, is that we can just trust that most of the settings are correct. I’m just going to tweak the RAM on the “Configuration” tab.
The only change I’m making is to increase the Fast Memory from none to the maximum of 8 MB. I figured that if we’re going to be compiling code, we might need a bunch of memory, not really sure, but it doesn’t hurt to bump this up.
The other changes I made were on the “Media” tab, where we configure the disks and drives on our machine.
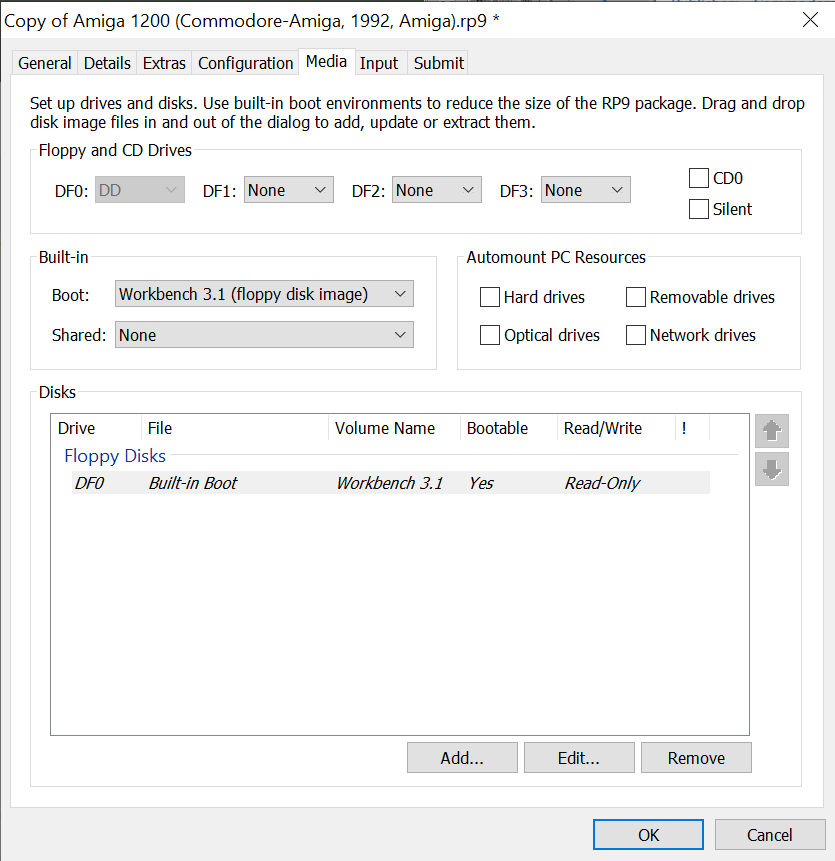
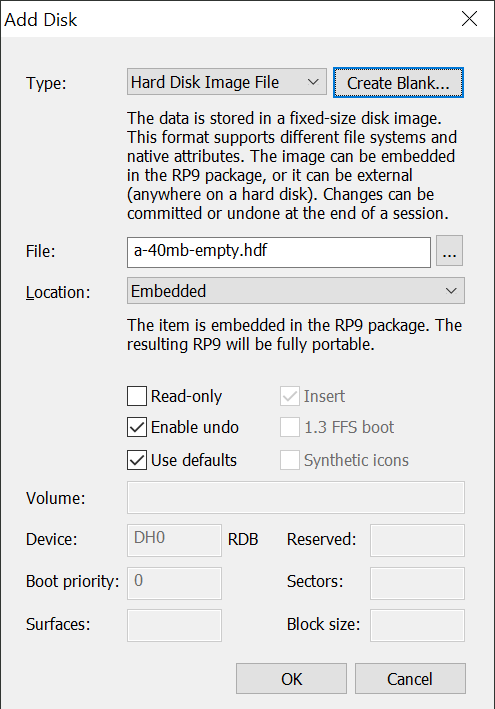
I clicked “Add…” to add a new disk, and in the resulting pop-up, chose a “Hard Disk Image File” and chose “Create Blank…”. I upped the capacity to 40 MB (from the default 10 MB) and left the other settings as they were.
Back on the “Add…” dialog, I chose to leave the location as “Embedded”. This means that our hard drive file and our VM settings will be kept packaged together in a single .rp9 file, making it easily portable between different machines. I might even store it on Google Drive so it’s available on all of my machines automatically.
“OK” the dialog, and it’s time to power up our machine with the play button on the toolbar.
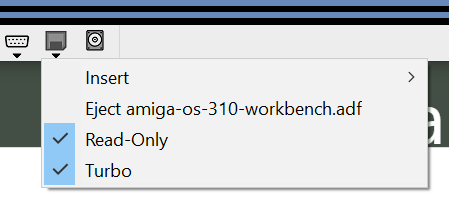
The emulator simulates the real disk speed of an Amiga, so I chose to put my virtual floppy drive in “Turbo” mode to speed up things. This can apparently cause incompatibility with some software, so I’ll disable it if I have any weird behavior, but I suspect things will be just fine.
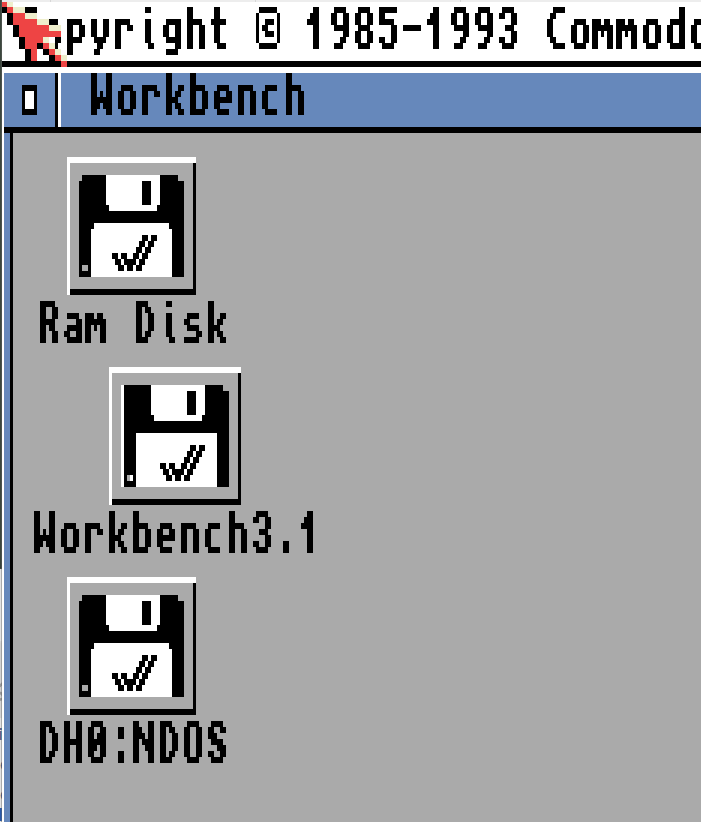
OK, so we’ve booted Workbench from floppy. It’s time to install it on our hard drive now. Here’s what we get when we boot up:
Select the DH0:NDOS volume (our hard disk) and choose “Format Disk…” from the Icons menu with the right mouse button.
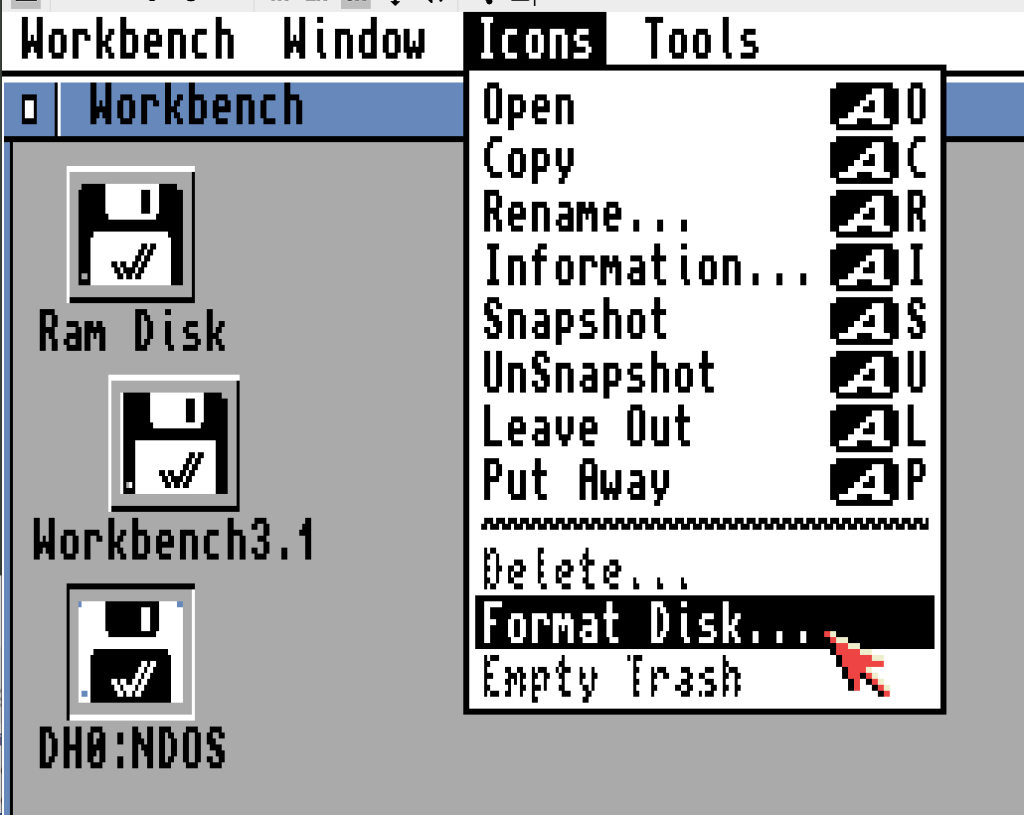
I chose to call my volume “System” and then went through no less than three “are you sure” prompts before formatting began!
Now it’s time to install Workbench on our hard disk.
Workbench 3.1 came on a bunch of disks. We’ll need to rotate through them all to get Workbench installed on to the hard drive, starting with the Install disk. On the emulators bottom toolbar, on the floppy icon choose to insert a disk from file. If the open file dialog doesn’t default to the right place, try looking in C:\Users\Public\Documents\Amiga Files\Shared\adf for the file amiga-os-310-install.adf.
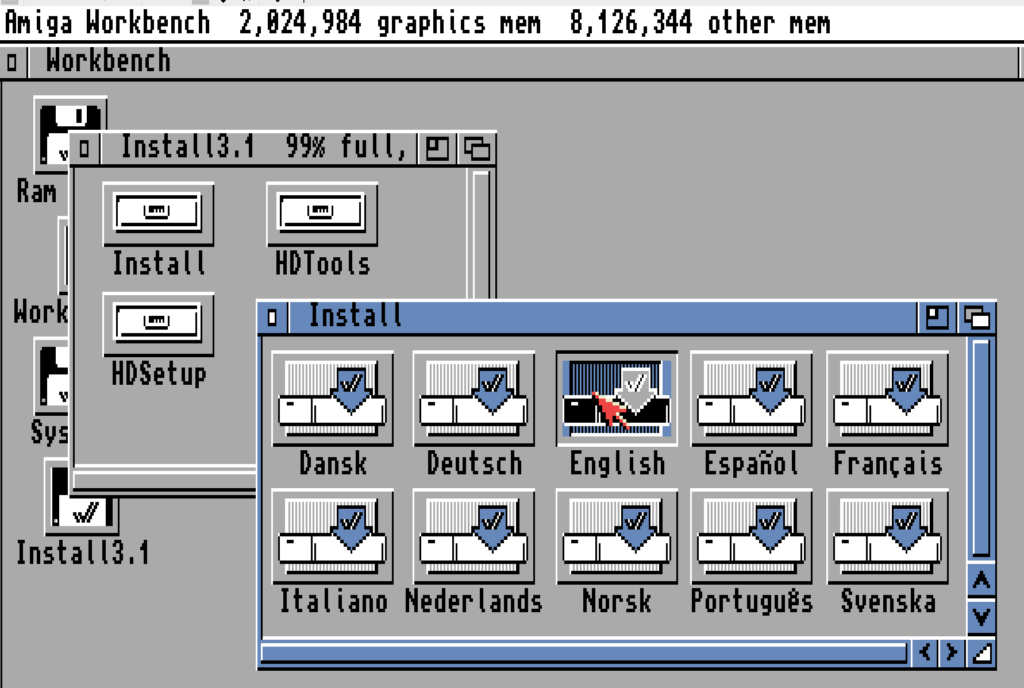
Open up the disk by double clicking on its icon in Workbench, then open the Install drawer, and finally double click on the English installer.
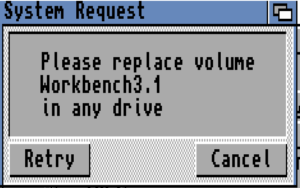
Throughout the process, you’ll be prompted several times to insert a volume in the drive. Just do that using the same technique we used to insert the Install disk. There’s usually no need to hit the “Retry” button …
Choose “Proceed”, and then “Install Release 3.1” before picking “Intermediate User”. Then click “Proceed” again to accept the defaults of “Install for Real” and log to “None”. It’s at this point that the installer makes a bad assumption. It wants to install to the “Workbench3.1:” partition, which is our read-only floppy drive.
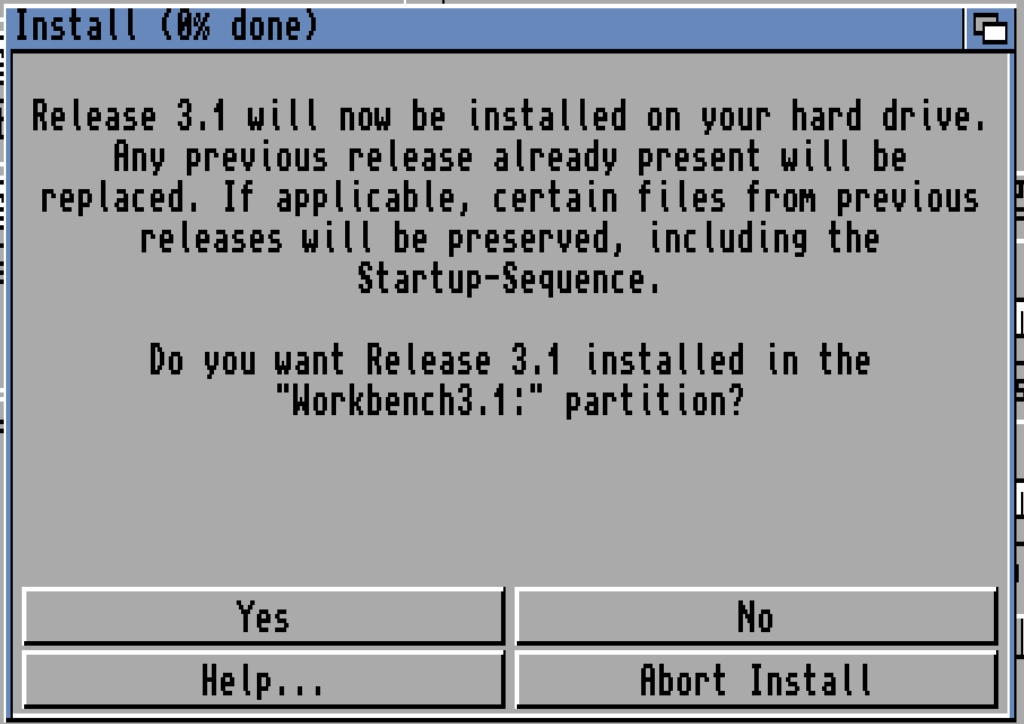
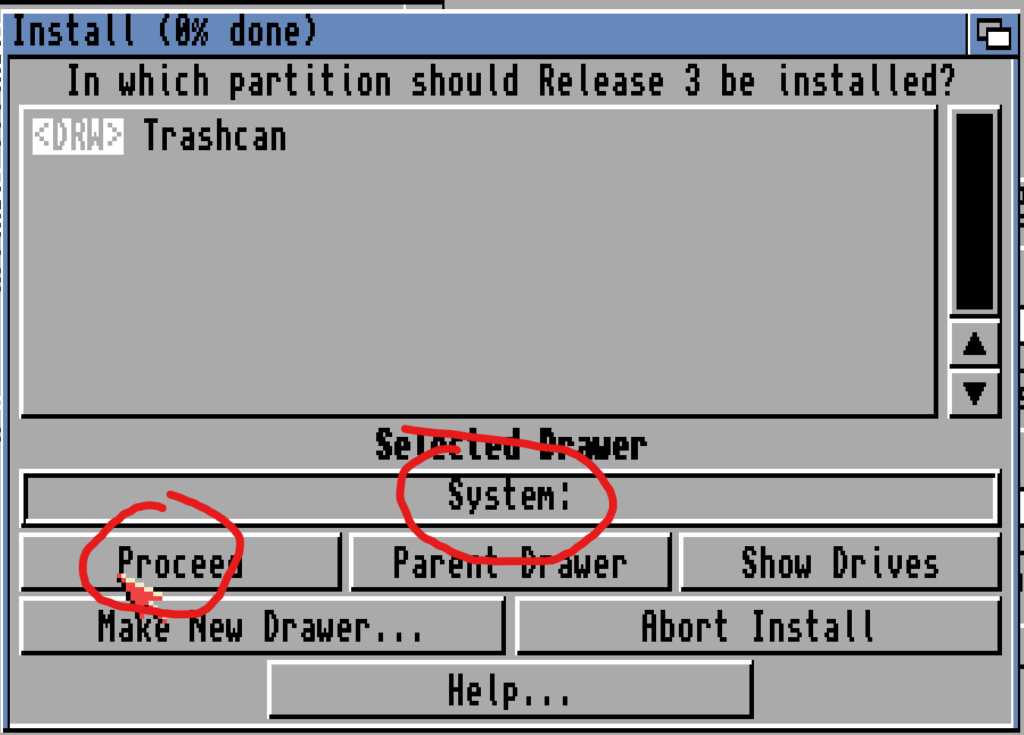
Choose “No”, then hit “Show Drives” and choose the “DH0: System:” drive, before hitting Proceed.
Hit proceed a bunch of times. When prompted for keymaps, I choose “British”, but you do you at this point.
Workbench will now begin installation, prompting you to change disks a few times through the process. Just remember, each time you change, make sure you’re inserting the “310” disk file for Workbench 3.1. Having Turbo enabled (mentioned above) on the floppy drive really speeds things up here.
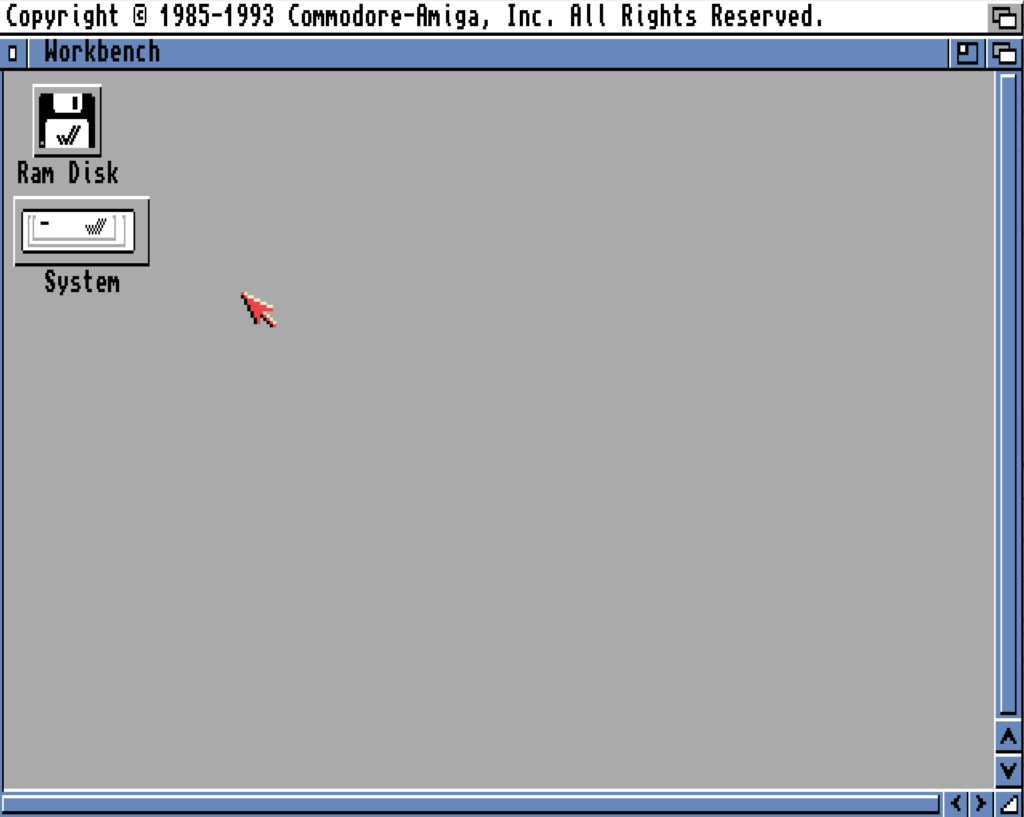
At the end of the process, we’re prompted to eject the final disk (again using the floppy disk icon at the bottom of the emulator) and then hit “Proceed” to reboot the system, which brings us up with our nice, shiny hard-drive intsalled Workbench.
We’re not quite done though. Power off the emulator. This will prompt you to commit changes to our hard drive file. It’s essential that you do leave this checked, as unchecking it would throw away all of the changes we’ve made to our hard drive this session … I think it’s only flushed to disk when we power down our machine.
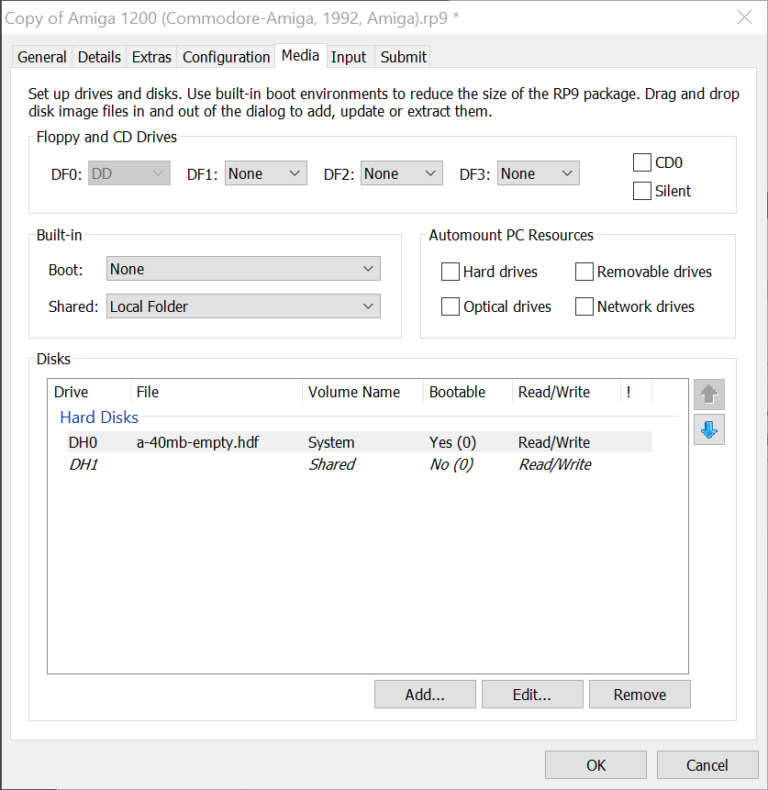
Now, go back to the media settings for our machine, and choose to remove the boot Workbench 3.1 disk, and set the Shared dropdown box to “Local Folder”. This adds a DH1: drive to our system, that’s mapped to a location on our host PC.
From the Amiga Forever’s main window, choose “File -> Open -> Shared (Local Folder)” which will open the shared location in Windows Explorer. We’re now going to need to download a few utilities from the Internet that we’ll need to be able to install our C compiler in the next blog post.
Head over to Aminet and download the following files:
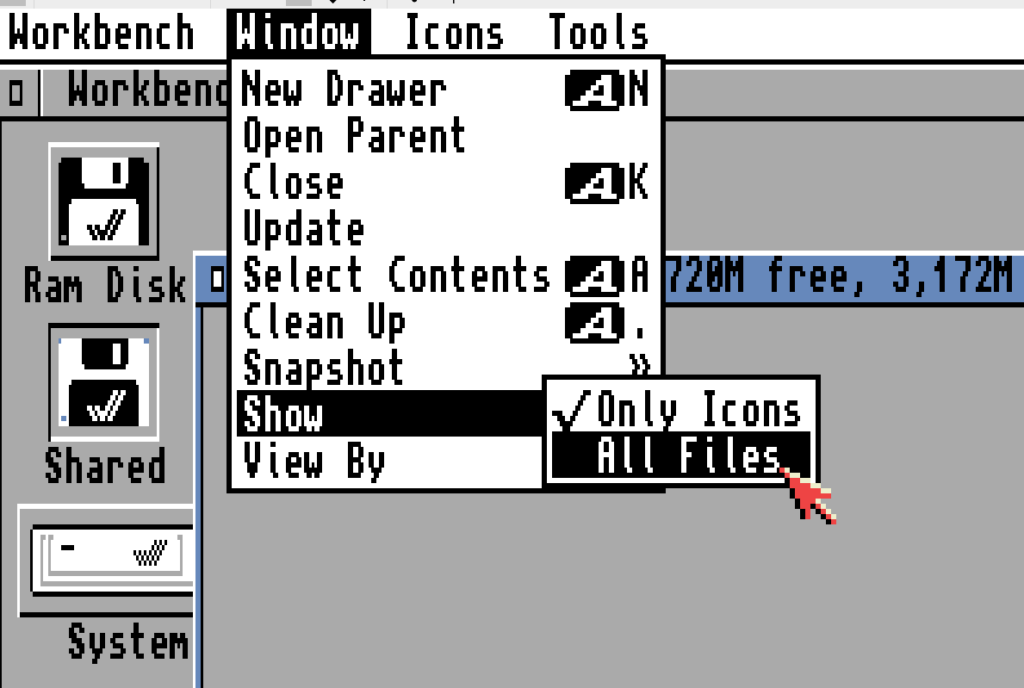
.lha files).Place the downloaded files in the Shared folder, boot the emulator, and you should see those two files in the Shared drive from within the emulator. In order to see them, you’ll probably need to choose to show all files, once you’ve opened the Shared disk, like this:
Double click the lha.run file, and choose click OK when prompted for parameters. This will automatically extract the lha program.
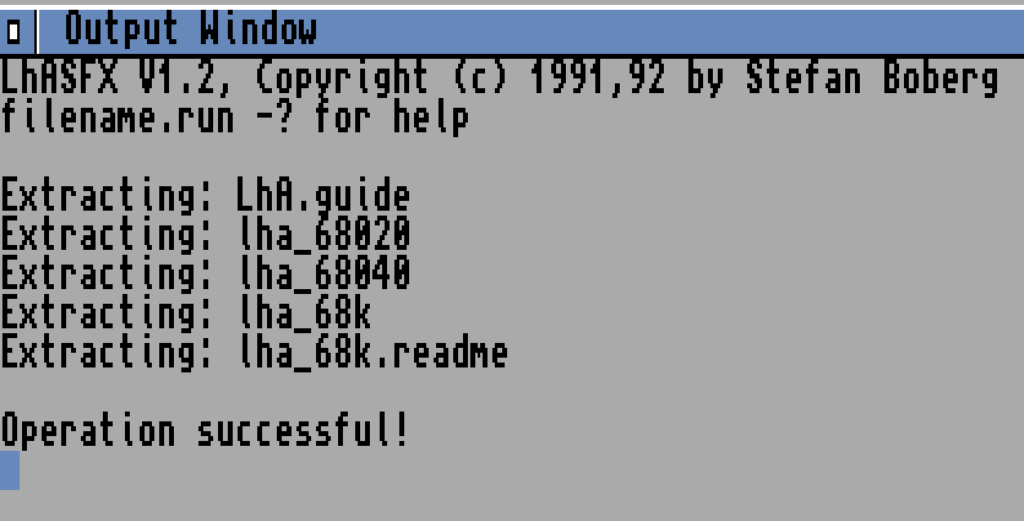
Close the output window. Disappointingly, you won’t see the new files in the Shared folder, but you have to make allowances for a 30-year-old operating system. From the menu, choose “Window -> Update” and then “Window -> Cleanup”. As we’re running on an Amiga 1200, which has a Motorola 68020 processor, the file we’re interested in is lha_68020. Open the System disk, choose to show all files, then open the C drawer. This is where Amiga stores commands, and it’s part of the path. Rename the lha_68020 file to lha (using the “Icons -> Rename…” menu option) and then drag it across to the C drawer.
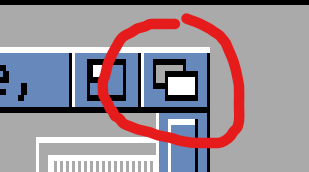
If you lose any windows during the process, this button at the top right of every window will either sent it to the back (if it’s the front-most window) or bring it to the front otherwise.
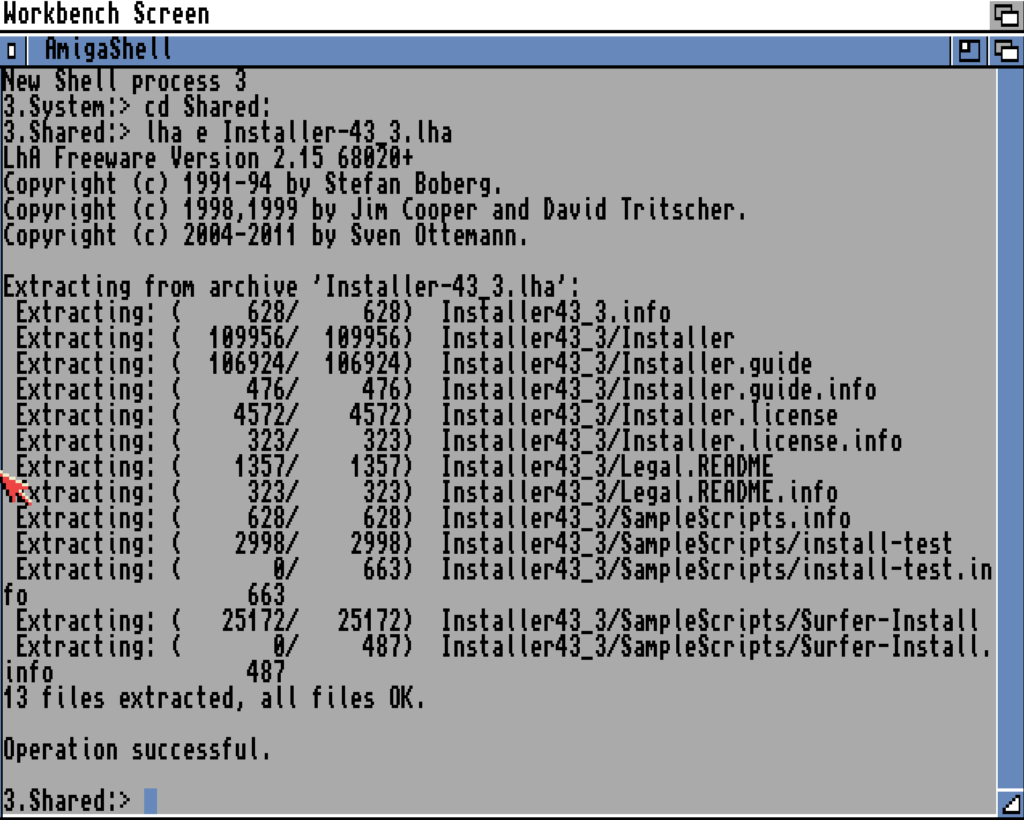
We now need to install the new Installer, but need to unpack it first. We’ll do that from the Amiga Shell, which we can find in the System drawer in the System disk.
Enter the commands cd Shared: and then lha e Installer-43_3.lha (the “e” means extract). You should see that Installer has been extracted to a new drawer Installer43_3, like this:
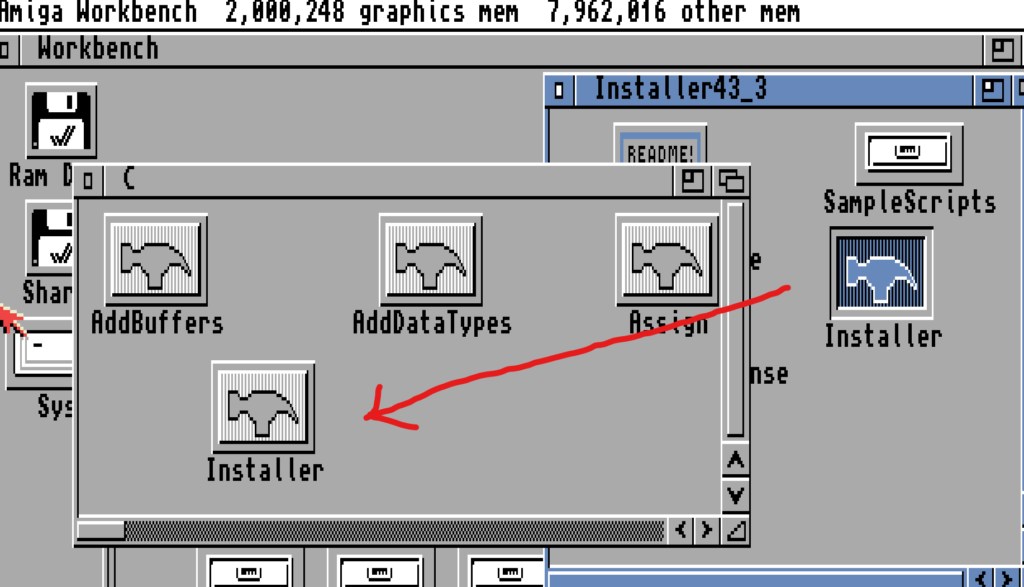
Finally, just like we did with lha, we need to copy Installer (from the newly created Installer43_3 drawer) to C:, like this:
That’s it … we have everything we need to get on with installing our C compiler next time.
This has been a super long post, but I think you can probably get everything done in maybe 15 minutes. Remember to save the changes to our hard drive when you power down the virtual machine!